Installing a shade sail doesn’t have to be complicated – we’ve invented some great ideas to help make installing your shade sail quick and easy. Our Pole Holder means you can easily remove poles when you want to mow the lawn, and along with our Easy Hoist Kit allows you to whip the sail shade up in no time! Ready for that brief spell of sun! We’ve put together a quick install guide that uses the Easy Hoist Kit and Pole Holder, or alternatively read about all your install options in greater detail below.
Quick links: Location | Support Types | Surface Area | Installation | Care
How Do I Plan My Sail Shade Structure?
You’ll probably already have in mind the area you would like to cover and, with any luck, how you’d like the design to look. If you haven’t decided there are some ideas below for how single or multiple designs could look.

Things to consider:
- Attaching your sail shade to existing structures such as your house or garage is a good start. If that is not suitable, then you will need to consider buying posts to hold your sail shade.
- Consider whether you plan to leave the shade up for months, or take it up and down to suit the occasion.
- Most importantly, you will need to install at least one corner of the shade sail lower than the others to allow any rain water to run off. If the sail shade is either not taut enough or installed at an insufficient angle, rain water will accumulate on the waterproof shade fabric like a bag causing the fabric to stretch or tear. We recommend at least a 30 degree angle of incline for each shade sail, providing the shade is sufficiently taught.
Where to position a sail shade?
Find a suitable anchor point for each corner of the shade sail, such as those listed below. These need to be strong enough to take the strain of the shade sail material when tensioned.
Anchor points could be:
- A wall or strong beam
- A suitable tree
- A wooden post at least 100mm diameter set in the ground
- A metal pole at least 48mm diameter set in the ground
- A metal pole at least 48mm diameter fitted into a sleeve in the ground, like a rotary washing line
Fixing points should be at least 2.4m above the ground, and it’s extremely important that these are sufficiently strong to take the full weight of the shade sail in windy conditions. The wind can add significantly to the stress of the shade sail on any fixings, so it is vital to be certain that they can stand the additional drag.
NB: If you have any doubts you should take advice from a builder or structural engineer.

How to support a sail shade
Pole support
If you need to install posts, these should be 48mm wide galvanised steel which is 4mm thick (these can be easily painted if required). Posts should be angled away from the centre of the shade sail by at least 10 degrees to provide additional strength and stability.

- For firm ground – Lay a 100mm depth of 20mm gravel at the base of the post. Add concrete and brace on the angle.
- For soft ground – Pour a 100mm depth of concrete at the bottom of the hole to provide a solid pad. Allow this to set. Add the gravel at the base of the post. Add concrete and brace post on the angle.

Constructing a pole
- Footings for poles for sail shades up to 16ft 5inches should be 400mm square and 800mm deep and this should increase to 400mm x 1200mm for larger sizes.
- Concrete should be well packed down around the pole and sloping slightly outwards at the top to ensure water does not collect around the pole. This should be left for a minimum of 48 hours to allow it to set completely before you attach the sail shade. We do not recommend the use of rapid set concrete.
Wall or fascia support
Once you have decided on a suitable site, the sail shade should be laid out in position on the ground allowing an additional 10% at each corner for tensioning. For larger gaps you may require stainless steel cable or similar to reach more distant fixing points.
As a fixing point you may want to consider adding a fascia support for added strength. These are available from most good hardware distributors and connect the fascia to the joists or trusses.
Tree support
If you decide to use a tree as a fixing point then it should be at least 250mm in diameter. If you don’t want to pull a much-loved sapling out of the ground!

Surface Area Dimensions
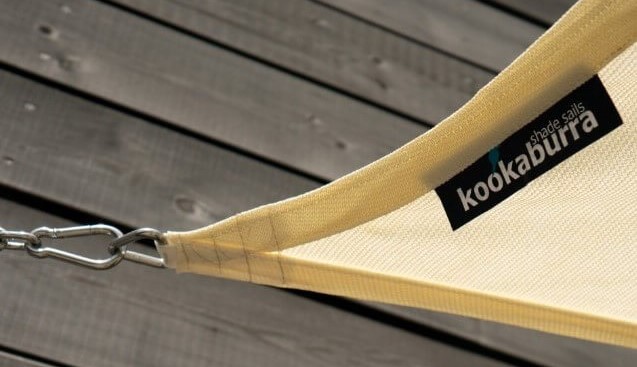
The surface dimensions of Kookaburra sail shades differ due to the cut of the fabric. For example, from corner to corner the sail shade is 5.4m but due to the curve in the middle, it also records 4.7m. Being designed in this way aids with tensioning of the sun shade and creates a more attractive curved appearance once installed.
Square

Rectangle

Triangle

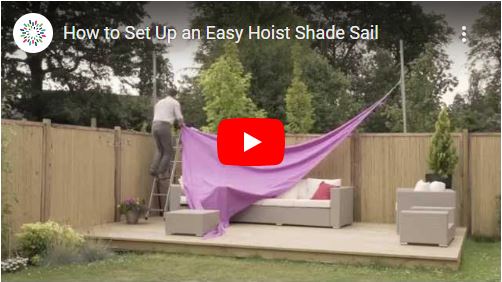
How to Set Up an Easy Hoist Sail Shade
Learn how to operate your strap tensioner with this simple tutorial video.
Care instructions
Your sail shade(s) may be cleaned at any time using a solution of mild detergent and water. Apply the solution with a sponge or a very soft brush. Let the solution stand on the fabric for 10 minutes and then rinse thoroughly from your garden hose or put in the washing machine on 40 degrees temperature. Do not put your sail shade in the clothes drier or scrub it was a stiff brush, scouring pad or an abrasive cleaner.
How to install a sail shade
There are several different options for attaching your sail shade to your chosen anchor point.
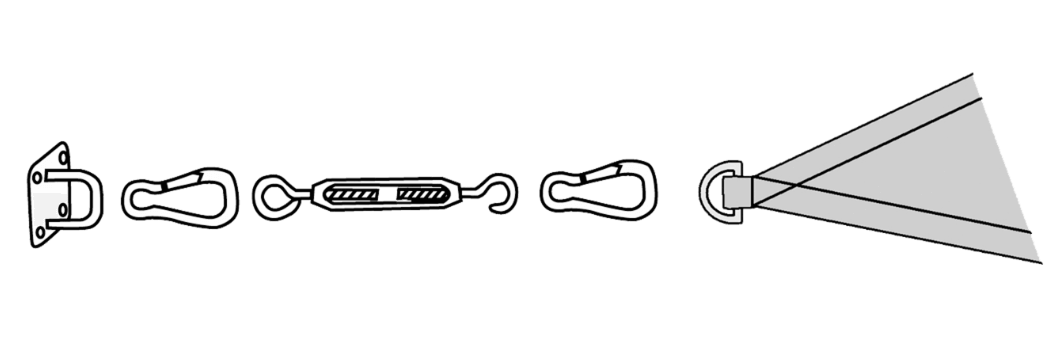
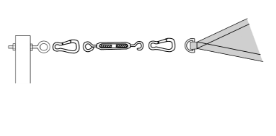
Option 1
Requires the following parts:
1 x Pad Eye
2 x Snap Hooks
1 x Turnbuckle
The Pad Eye is suitable for solid structures such as walls or wooden beams and the Turnbuckle serves as a tensioning device, allowing you to achieve a taught sail shade.
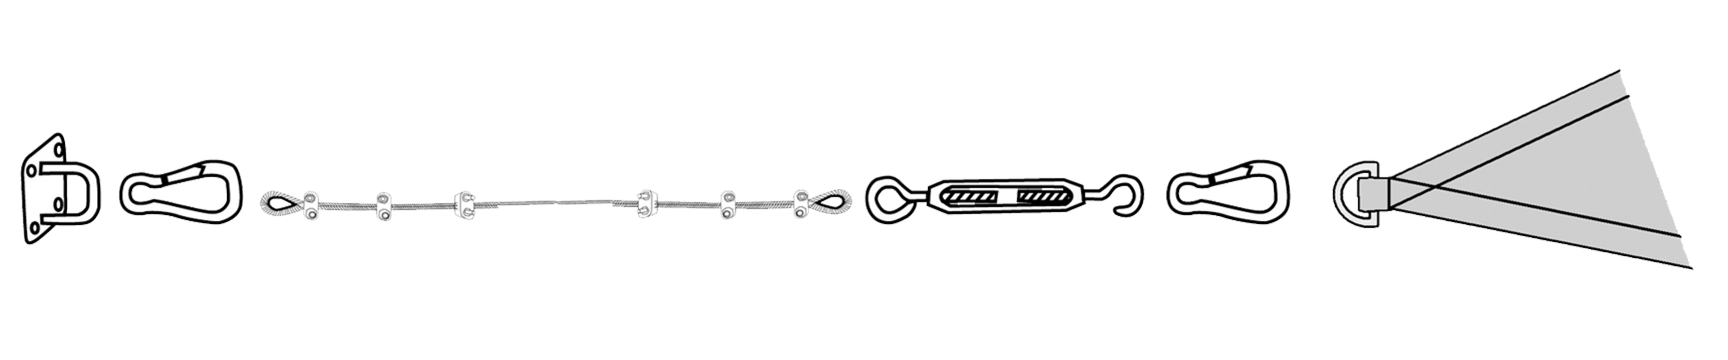
Option 2
Requires the following parts:
1 x Pad Eye
2 x Snap Hooks
1 x Turnbuckle
1 x Stainless Steal Cable Pack
In this setup the sail shade needs to be further away from the anchor point than the option 1 kit allows. The Stainless Steal Cable Pack is available in several sizes which can be cut to size. This method is a very strong and stable way of lengthening your anchor point.
Sail Shade Pole and other options
If your anchor point is a pole or another secure point such as a Wooden Eyebolt Screw, then the same two basic above options apply. However, you will not need to purchase the Pad Eyes but will instead need an Eyebolt Kit (for Sail Shade Poles) or whatever accessory you require. See the images below.

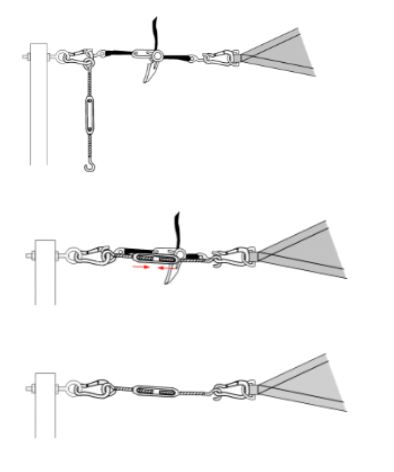
Using a Ratchet Strap Tensioner
To achieve additional tension for your sail shade you can use a Strap Tensioner. Please see the steps below.
Step 1 Attach the strap tensioner to both snaphooks and the turnbuckle only to one snaphook.
Step 2 Use the strap tensioner to tighten the sail shade.
Step 3 Hook the turnbuckle onto the other snaphook and turn the middle section, tightening the turnbuckle to the required length.
Step 4 Release the strap tensioner and unhook from the snaphooks.
How To Operate Your Strap Tensioner
Learn how to operate your strap tensioner with this simple tutorial video.
How to tie a taut-line hitch primrose Tutorial
Learn how to tie a taut-line with this simple tutorial video.
Need more help?
Haven’t found what you’re looking for? Find more water feature guidance on our customer help centre or send us a message via our live chat service.